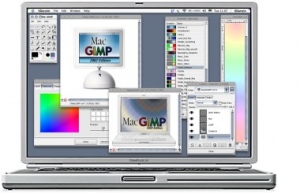
The first step is getting GIMP installed. This isn’t as easy as it sounds, as we want full Python plug-in support too. GIMP offers several plug-in systems, including an older, Script-Fu route and the newer, more able Python-Fu system. GIMP offers only experimental 64-bit support, so we’re using the 32-bit build. This means we can use 32-bit versions of all the corresponding plug-ins and extras without causing any additional headaches.
To begin, download (but don’t install) GIMP for Windows from http://gimp-win.sourceforge.net. You can download the Help file too if you feel the need. Next, go to www.python.org/download/releases/2.6.6, grab the Windows Installer of Python 2.6 – the 32-bit version -and install it. GIMP also requires the PyGTK package from www.pygtk.org. Click ‘Downloads’ and at the top of the page you’ll see a link for the all-in-one installer. This whisks you off to an FTP site, where you can grab pygtk-all-in-one-2.24.0.win32- py2.6.msi. Run this, and it will install the required PyGTK, PyCairo and PyGObject packages. You’ll need to grab v2.6 of Python rather than v2.7 or v3.x, as that’s the version GIMP is designed for.
You can now install GIMP. Choose the ‘Customise install’ option and make sure the Python components are selected. If you already have an install of GIMP, it’s easy to check if the Python element is working. In the interface, open the Filter menu. At the bottom you should see a Script-Fu entry, and alongside that a Python-Fu entry. If you don’t, install the Python components mentioned above and reinstall GIMP, using the ‘Customise’ option and making sure the Python components are selected. You might need to reboot for this to register.
Plug me in
GIMP offers a good baseline of features, and its plug-in and script systems extend those features even further. One add-on we’ll take advantage of is the Layer Effect Python plug-in. There is a more basic script version, but it lacks a live preview, hence the effort to get Python working.
GIMP plug-ins can live in two places: either within the User-settings folder in Users<username>.gimp-2.6 plug-ins, or else within the install directory at Program Files (x86)GIMP-2.0lib gimp2.0plug-ins. Similarly, scripts will live in the same folder location, but instead of the Plug-ins directory, they will be in Scripts. These locations can be checked or changed via the preferences; in GIMP select the ‘Edit > Preferences’ menu and then select the ‘Folders’ section.
Let’s use that freshly acquired knowledge right now. Head over to http://registry. gimp.org/node/186, download the Layerfx.py file and pop it into the Plug-ins folder. Next time you start GIMP, a new submenu will appear in the Layers menu called Layer Effects. This can apply various Photoshop-like enhancements to layers, which we’ll use when creating our new logo. There’s a large selection of additional plug-ins and scripts out there, and personally we think many are pointless distractions. GIMP provides enough tools to play with without the additional confusion even more effects will provide.
Get set, go
Before getting stuck in, you may well want to take a little time to get familiar with the GIMP interface, arrange it to your liking, and tweak a few settings so it works better on your system. We find the default layout well designed, but it’s not for everyone.
One area you might want to consider is memory allocation. Within GIMP, select ‘Edit > Preferences > Environment’. This controls the amount of memory GIMP will use. On memory-limited systems you won’t want to go crazy, but on new systems with 4GB+, these values could be greatly increased, particularly if you do a lot of high resolution image editing. The Title cache is the main performance value, as this is the amount of immediate image storage GIMP has before caching off to the virtual memory page file. The default of 1GB is a lot, and is enough for this project, but this can be increased to 80 per cent of the total available memory if you feel brave. We’d prefer to increase the number of undo levels and available undo memory, as it’s more useful to be able to skip back at least 10 steps.
As for GIMP itself, it uses the now standard multi-layered canvas approach, with floating tool tabs and a main work space. Near the top of each tabbed area you should see a small left-arrow icon, which you can click to adjust exactly what tabs are available.
It’s easy to drag these out on their own and reattach them as you see fit. As you use GIMP more, this lets you keep the most useful tools to hand.
It’s easy to use selections within GIMP, and it’s possible to make one with any of the various tools. Holding [Shift] enables you to add to the selection, and holding [Ctrl] enables you to subtract from it. If you decide you want to move a selection, you need to choose the ‘Select > Float’ menu, which is something you often have to do. We’d also strongly advise you to get some practice in with the Path tool. This lets you cut out objects precisely, but more importantly it provides a way to save and adjust the cut-out later.
We found a number of tools in GIMP somewhat lacking due to their lack of precision, but once you get used to the foibles of the package it’s powerful enough and the logo creation technique used here can be pulled off in a few minutes within GIMP.
Guest Post by Kashif Raza, currently working for makeawebsitezone.com. Trying to determine how to host a website online? Visit Make A Website Zone to learn the process of creating and hosting a new website.