Libraries are one of the coolest features introduced by Microsoft for Windows 7. They can help you organize your files and folders very efficiently. By using the library system you can easily build a customized file organization mode, so you can always quickly find exactly what you are looking for. You can also sort, tag or edit files and folders with just a few clicks. In this article you will be explained what libraries are, how they look and how to create new ones.
What is a library in Windows 7?
Think of a library as a collection of virtual folders in your computer. A library is a reference to one or more folders on your computer and the files inside them. For example, you can have documents stored in multiple locations such as the Documents folder, Desktop, and other locations. You can have a library called Documents and include references to all these locations. When you open the library you see all these folders and their contents, organized in one single place. This feature helps you organize all the files together in one place, regardless of where they are stored and has many benefits in terms of productivity when working with lots of files spread across multiple locations.
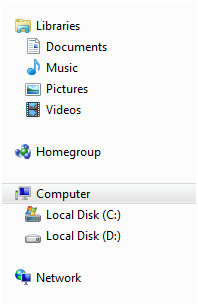
By default, the following libraries are available: Documents, Videos, Pictures and Music. Three of them can be found by default in the upper right side of the Start menu. However, you can create as many libraries as you want. They can all be accessed also from the left side menu of Windows Explorer, as you can see below:

How to create a library
Open Windows Explorer. Then right click Libraries in the navigation pane. Go to ‘New’ and select ‘Library’, the only option available. Click on it and then type the name of the newly created library.
How to add folders in a library
Now that you have an empty library, adding folders to it can be done by double-clicking the library first, in order to open it. Then click “Include Folder” and navigate to your computer to find the folders you want to include in the library.
After you select the desired folder, Windows Explorer will scan the contents of the folder and will include the files to the library. The process may take a while depending on the number of files and folders included. During this process, you will see a progress bar. When finished loading, it will disappear and you will see the entire contents of the newly created library.
Depending on the contents of the library, the files might have their own set of customizable features they can be sorted after, as follows:
Documents: Folder, author, date modified, Label, Type, Name;
Pictures: Folder, month, date, rating, label;
Music: Folder, Album, Artist, Song, Genre, Rating;
Video: Folder, Year, Type, Length, Name.
These are the sort tags you can use for each category. To use them, go to the library you want to sort, click the button next to “Arrange By” and select the sort criteria.


