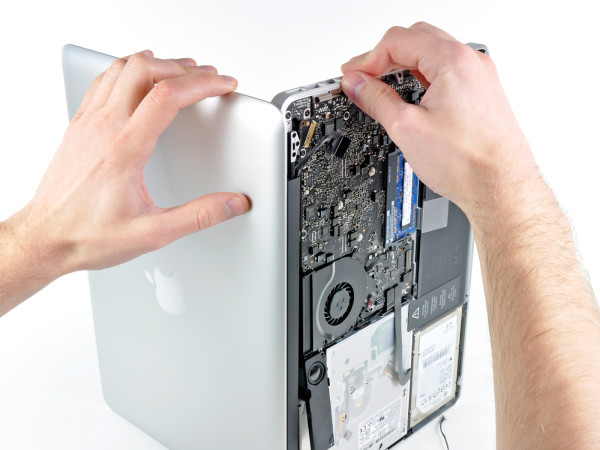
Everyone’s Macbook will ultimately have problems. Though it is a surprisingly durable device, sometimes problems occur that can stop the hinges holding the screen to malfunction or the hard drive to come to a stop. This means that you will have to do a little research and find out how to fix your problem step by step.
A Macbook’s hard drive has a lifespan which is limited. This will require replacement, which is easy to do once you know how to go about it. Following are a few steps that can help you when it comes to replacing the hard drive of your Macbook. It is highly advised that you take your battery out before you attempt to do anything to your hard drive.
Unscrew It
The hard drive is at the bottom corner of the machine. It is to the left of the battery and below the optical drive. Usually, it will have white sticker and the letters GB written on it, which makes it easily recognizable. By unscrewing two screws which hold it in place and removing them, you can also pull out the black bar beneath them.
Unplug It
The hard drive will be connected to the computer with a flat ribbon which will have a large plug at the end. If you pull that out, gently, from the hard drive, you are halfway done. After this, all you have to do is remove the four screws on the sides of the hard drive, which keep it in place. Keep them in a safe place because after you install the new hard drive, you need this to keep it in the same place.
Prepare Your New Drive
If you use slim tools to move the hard drive around, then it will make the entire process easier. All you have to do is take the new hard drive, put it in the place of the old one and use the screws to hold it in place. At the end, all you have to do is attach it to the flat ribbon you removed earlier, put the black separator back in place and that is it.
Partition the New Drive
One you are done with everything and have put it back together, start up your Macbook. After you are finished, you will probably notice that the new SSD drive is not available as an option. This will happen because you still have to partition it by going to the Disk Utility options in your computer. The Disk Utility option will be under Utilities in the menu bar, where you can simply follow instructions.
After everything is done, you can get all your files from back up, so you don’t lose your files. You can easily function your computer after and make sure it is not slow, or has problems. By keeping up to date on all problems that arise with Macbooks, you can do a lot of the things that technicians charge a lot of money for, and save a small fortune for yourself.
Graham Monroe has been fixing Macbooks for almost a decade. His experience and advice is one of the most sought after, especially by college students. For more information on how to fix and service your Macbook, click here to get excellent services.


