In this guide you will learn how to share a printer with other computers on the network. Before starting, you should know that if all computers have Windows 7 installed the procedure is extremely simple and works almost instantly. If you have computers with other operating systems installed, then do not worry, because using your printers from these devices connected to the same network is also possible.
How to share a printer over your home network
First of all, open the Devices and Printers panel. There you will see a list of all external devices installed on your system. Select the printer you want to share, right click it and select Printer properties from the menu similar to the one shown below:

You will see a window with all the printer properties. Depending on the printer model and the drivers available, you can see different sets of options.
Go to the Sharing tab. If this tab does not exist, make sure your printer is open and fully functional. Select the option that says “share this printer”. Then you can edit the name under which the shared printer will be seen by other computers over the network. In this case, the default name will be the printer model name, but this can be changed to any name you want.
The ‘render print jobs on client computers’ option is helping to keep the level of performance for the computer to which the printer is connected, especially when printing large orders. In case this option is checked, then the print jobs will be executed on the systems that initiated the printing rather than the computer that has the printer driver installed.
When done, all you need to do is click OK. The printer is now shared by the computers on your network
How to access a network printer
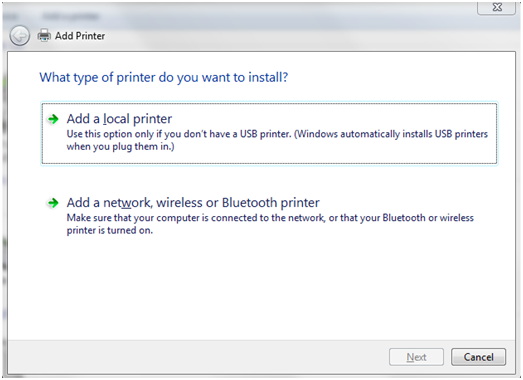
If all the computers on your network have Windows 7 installed or are part of the same HomeGroup, then all you need to do is check that the printer is turned on when someone needs to print a document. If it is stopped, other computers will not print. In case a machine does not find the printer by default, you may need to open the ‘Devices and Printers’ tab again and click on ‘Add printer’ at the top. You will be presented with a window similar to the one below:

If your network has computers with other versions of Windows or other operating systems you will have to follow some steps. First, you need to download the printer drivers for other operating systems. Install these drivers on the other computers and install the printer as a network printer. In order to do this properly you should check your printer documentation procedure, which varies depending on the driver version. There is no general procedure available for all printers. Once finished, the other computers will be able to see and work with the printer that you shared across the network.
To sum up, sharing a printer between computers with Windows 7 is a straightforward task. In addition, HomeGroup options offer additional help, making things in Windows 7 simpler than ever. With just a few clicks, the printer will be available to all computers and users can print documents, photos, etc.
